Before personally trying out microneedling myself, I wondered, why would anyone in their right mind want to punch tiny holes in their face! It did not make sense at first.
But my friend tried it a year ago, giving me just the push to try it out myself. And now here I am, helping you overcome your doubts about microneedling at home. After all, getting a radiant skin without leaving the comfort of your home - Ain’t that the dream!
Truth be told, Microneedling has been around for a while now. This minimally invasive skin rejuvenation procedure involves inserting fine needles into the skin for a number of benefits. Even skin tone, even texture, age spots, fine lines, wrinkles, or acne scars, and even hair and beard growth - I doubt if there's anything that the microneedling devices (a.k.a. derma rollers) cannot do!
But here’s the thing: consistent and proper use is necessary for a derma roller to work its magic on your skin. Today, we are going to discuss how to use a microneedling pen at home effectively to enjoy its benefits. If you have been thinking of incorporating microneedling into your skincare routine or want to complement professional microneedling, this blog is for you.
But before we jump into that, let's know what microneedling is all about and how it works.
Understanding Microneedling: What Is It and How Does It Work?
As the name suggests, microneedling is the process in which a bunch of tiny needles work to create micro injuries in the skin. "Microneedling is beneficial in stimulating collagen production to improve the texture of the skin," says Belinda Zhai, Mychway's beauty consultant. "Microneedling can work well in combination with a topical application of PRP (platelet-rich plasma), accelerating the healing process."
An ideal at-home microneedle device has a needle size of about 0.5 to 1 millimeters. When these needles rotate over the skin, tiny wounds are created in the stratum corneum, i.e., the top layer of our skin. These small injuries on the skin help promote collagen and elastin production. This, in turn, enables our skin to stay tighter and free from wrinkles and fine lines.
Now let's find out some microneedling benefits you can reap from this at-home treatment:
-
Fine line reduction: As mentioned earlier, microneedling stimulates collagen production in the skin. This increase in collagen production helps plump up the skin, reducing the appearance of fine lines and wrinkles.
-
Target acne scars: Microneedling creates tiny holes in your skin to encourage it to heal itself. This healing process helps to reduce acne scars by producing healthy skin cells.
-
Improve skin texture: As the needles penetrate the skin, they stimulate your skin's natural healing process. This helps reduce the appearance of pores, leaving you with a more even complexion.
Spotlight On At-Home Microneedling Kit
At first it may seem daunting to you, but wait till you hear out the benefits of Microneedling, to decide if you want to give it a spin at home. Now, there are many types of microneedle tools sold in the market. They may vary in terms of the needle length, material, manual or electric, etc. Whether you end up choosing a microneedling pen, derma roller, or microneedling stamp, let's learn how they work differently.
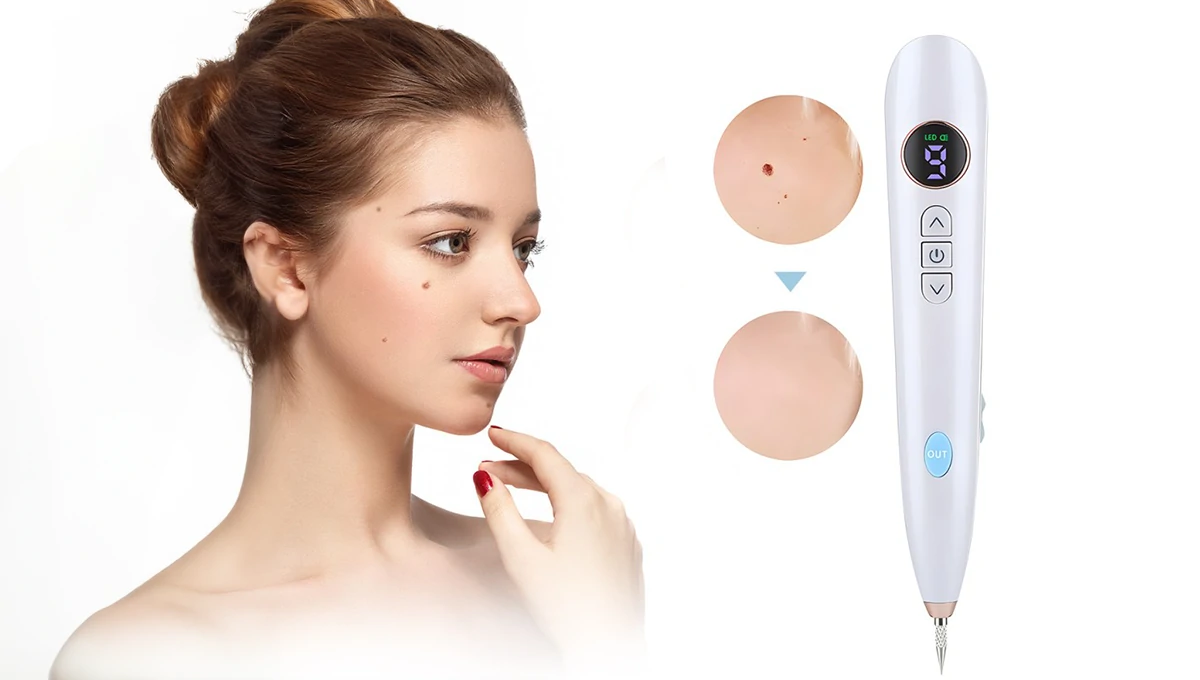
Microneedling pens or Derma pens are generally small electric tools that give you more precision and control. It is held like a pen and held against your skin or scalp for the target treatment areas. It's a good option if you're goal is to treat mild scars and fine lines.
If your focus is on targeting damaged or uneven skin or maybe wrinkles, using a microneedling stamp at home is your best bet. They are close to derma pens, but are ususally manual tools with the head shaped like a stamp. This device ensures painless micro-cuts around the area, helping to refine your skin. It's an ideal choice for blackheads and wrinkles.
Derma rollers are similar to jade rollers, if you have seen one. Only the roller head is covered with micro needles all around. As the name suggests, you simply roll it on your skin to feel the benefits. It is meant to promote skin absorption and maximize the results of your skin care products. If you want to improve your skin texture with a derma roller, by all means, go for it. The device can rejuvenate your skin like a newborn, making you feel more confident.
Now, let's get you all set for your first microneedle session at home. Here's a list of things you need for your microneedling at home kit:
-
Your chosen microneedling tool (pen, stamp, or roller)
-
Sterile microneedles
-
A cleansing solution
-
A numbing cream (optional)
-
A soothing serum
Choosing the right length of the needles is important. If you are new to it, shorter needles (0.24 mm to 0.5 mm) are good to go. Titanium microneedles are the most effective ones, and they are known for their durability and hypoallergenic properties.
Step-by-Step Guide: How to Microneedle Face at Home Safely
Microneedling treatments are generally considered safe, but you still need to get the basics right. You don't need to worry about in-office treatments because you have experts there. But doing it at home is another thing. It requires proper care and knowledge. Knowing how to do microneedling at home safely is your first step toward getting flawless skin. Here's what experts say about performing microneedling at home.
Preparation:
Cleanse your face with a gentle cleanser. You need to sanitize your microneedling device as well. Apply numbing cream if necessary.
Microneedling Technique:
Applying the correct pressure is essential. Whether you want to use the device on your face or scalp, don't push too hard on it, as it may cause scarring. Ensure you gently roll the device over your target areas (fine lines or areas where you have thin hair on the scalp).
Roll your device in one direction—either vertically, diagonally, or horizontally. Repeat the process two to three times. Divide your face into four sections: the forehead, neck, cheeks, and lips/chin. Once you have covered one section, repeat the same process until you have covered the entire face.
Post-Treatment Care:
-
Immediately after the treatment, apply a serum containing hyaluronic acid or growth factors to help soothe your skin and promote healing.
-
Avoid touching your face or applying makeup for at least 24 hours after the treatment.
-
Use sunscreen to protect your skin from the sun's harmful rays.
Safety Tips for At-Home Microneedling
-
Always use sterile microneedles to avoid the risk of infection.
-
Be cautious with the areas near your eyes, mouth, or nose.
-
Talk to an expert if you have any side effects (irritation or infection) or underlying skin conditions before starting at-home microneedling.
How Often Should You Microneedle at Home?
Wondering how often can you microneedle at home? Maintaining your skin's natural balance is key. Overdoing microneedling can make your skin feel irritated or even damaged. Here is how often to microneedle at home.
According to estheticians and beauty consultants, the number of treatments depends on the depth of the needles. If you aim to improve your skin tone (mild anti-aging) and product absorption, 0.25mm—0.5mm needles are the ideal size. The recommended microneedling frequency for this would be once every 2 to 4 weeks.
For Your Face:
How often you should microneedle your face depends on your skin type. A good starting point is once every 4 to 6 weeks (if you have normal skin) and you want to reduce fine lines and light acne scars (ideal needle size is 0.5mm - 1.0mm). For severe acne scars, stretch marks or more profound skin concerns, use a device with 1.0mm - 2.0mm needle size. Ideal frequency of the treatment is once every 6 to 8 weeks.
NOTE: If you have sensitive skin, try microneedling once every eight weeks.
For Your Scalp:
Use a microneedling device once every 2-3 weeks, especially if your target is hair growth. If you have a sensitive scalp, perform less frequent sessions, like once every six weeks.
With microneedling for hair loss at home, you have to be patient. Don't get hopeless if you don't see results after a couple of sessions. It takes time and consistent effort to enjoy the results you want.
Microneedling for Hair Loss: How to Use a Microneedling Pen on Your Scalp
Want to reap the hair growth and scalp care benefits of microneedling? The key is understanding how to use a microneedling pen on your scalp at home effectively. Before delving into the steps, let's explore the benefits scalp microneedling has to offer:
-
The process of microneedling creates tiny wounds in your scalp. By doing so, it delivers nutrients and oxygen to your hair follicles. This can encourage them to become more active and promote hair growth.
-
A microneedling pen works to increase blood flow to your scalp. This provides your hair follicles with the nourishment they need to thrive.
-
Using an at-home microneedling device reduces inflammation on your scalp. This is beneficial for those with scalp conditions that affect hair growth.
Now let's take a look at how to microneedle scalp:
-
Wash your hair with a gentle shampoo to remove any dirt or oil.
-
If you prefer, you can apply a numbing cream to your scalp about 30 minutes before starting.
-
Gently move the microneedling device in small, circular motions across your scalp.
-
Avoid applying too much pressure, as this can damage your scalp.
-
Apply a hair growth serum containing minoxidil or finasteride to enhance the results.
Microneedling Before and After: What to Expect and How to Maximize Results
If you want to treat mild skin concerns like fine lines, wrinkles, and minor acne scars, microneedling at home is a fair choice. You must have realistic expectations from the treatment (as at-home treatments are less dramatic than those performed by professionals).
Following proper at home microneedling before and after care guidelines is key to making the most of your at-home treatment. This may involve preparing your skin before the treatment with a gentle cleanser or not applying makeup right after the treatment. You need to follow these guidelines to get satisfactory results.
Generally, you may see improvements in skin texture after two to three sessions. Remember, staying consistent with the treatment is key to achieving long-lasting results.
Conclusion
Using a microneedle at home requires taking safety measures and following proper techniques. Hopefully, this guide has helped you learn everything about microneedling at home. We have covered how to use microneedle pens at home and maximize the results.
If you think of incorporating microneedling into your skincare routine, research first. Make sure you choose the suitable device and needle size according to your skin type and concerns. Consulting a dermatologist can also be beneficial.
FAQs
Is microneedling at home safe?
If you are considering microneedling at home, you need to keep a few considerations in mind. Exercise caution if you are doing it for the first time. Make sure you think about the needle size before buying an at-home microneedling tool.
How many times should you microneedle at home?
You may have doubts about how often should I microneedle my face at home. Actually, it depends on your specific skin type and the concern you want to treat. You may start noticing visible improvements after two to five months.
What to apply before microneedling at home?
Apply a hydrating serum on your skin before microneedling. Ensure the key ingredient is hyaluronic acid. This serum works to maximize the benefit of your treatment. You may also consider serums with peptides and ceramides.
What to put on skin after microneedling at home?
Your skin is very sensitive right after a microneedle session. So, apply serums containing vitamin C, hyaluronic acid, peptides, or skin barrier repair serum or moisturizers. These ingredients help your skin to produce more collagen, making it feel supple and dewy.
Should you perform micro-needling without a serum?
It's best to apply serums when you are microneedling at home. This is because it promotes healing and product absorption.
Can microneedling go wrong?
If you don't take proper measures and proceed with caution, the chances of your skin getting damaged are high. Be careful with the at-home tools to avoid the risks of bleeding, bruising, itching, or peeling.